Twitter Spaces is a fairly new feature of the micro-blogging social media platform that has proved to be quite popular. It allows users to create virtual rooms where they can interact with each other through audio-only mode. While anyone can drop into a room and start listening, only a few with “speaker” access can speak. If all of this sounds similar to Clubhouse, that is because Twitter basically cloned the audio-only app to release the functionality as an integrated feature on its app.
Twitter has now added support for recording Spaces and sharing it with others afterward. It allows even those users to be able to listen to the discussion who could not join the Space when it was live. As for hosts, it gives them an opportunity to expand their reach and connect with new users along the way. In this tutorial, we will explain how you can record Twitter Spaces and share it with anyone you want.
Also Read: How to enable Tip Jar on Twitter
How to record Twitter Spaces:
- Launch the Twitter app on your device and visit the Spaces section by tapping the middle icon on the bottom bar.
- Tap the blue icon in the bottom right corner to create your own Space.

- Give your Space a name and choose up to three related topics.
- Turn on the toggle that says Record Space.
- Tap on Start your Space to begin the session instantly. If you wish to schedule it, tap the calendar icon next to it.
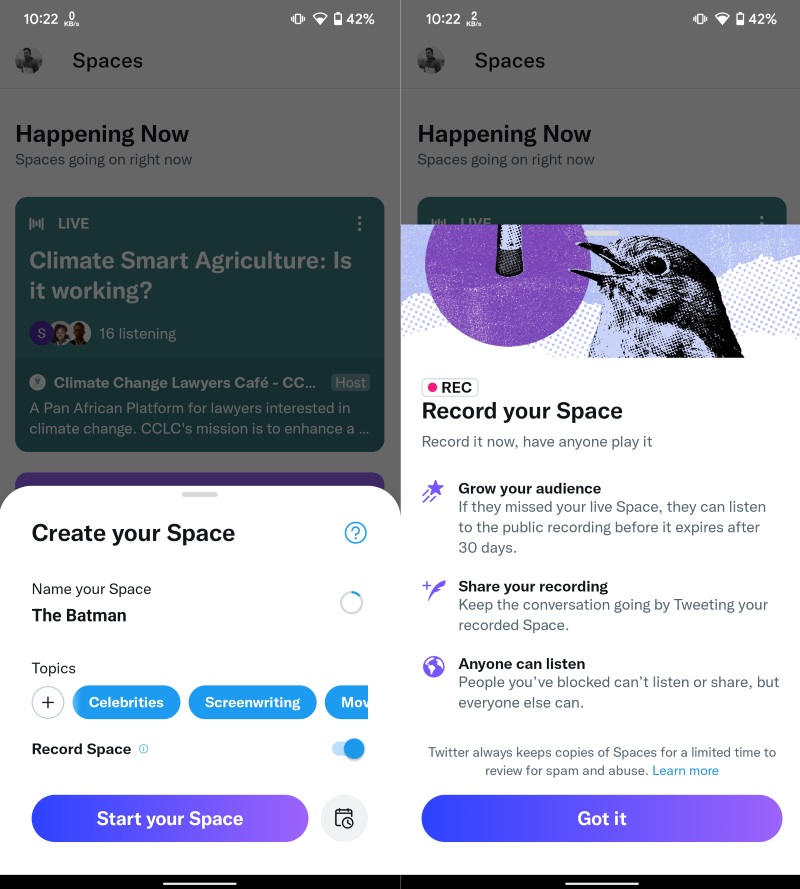
This way, you can record a Twitter Space within a few taps. It is important to note that only the host of the Space can enable or disable recording. It means if you are a listener, you cannot record a space natively. Twitter will provide the host with a link to the recording after the space ends. This link can be shared with others via a tweet, DM, or embedding on a website. It also lets users set a start time for the recording so that their followers can start listening to it from the moment the conversation begins.







Comments