Apple’s iPhone 14 lineup comes with many changes but one change has caught everyone’s attention. It is eSIM-only support in the United States which means iPhone 14 buyers in the country will have no choice but to start using an eSIM. This is applicable to all four models: iPhone 14, iPhone 14 Plus, iPhone 14 Pro, and iPhone 14 Pro Max.
eSIM is not a new concept and many OEMs including Apple have been using it for the last few years. However, they have all offered it as an option where users could choose to keep using the physical SIM. This changes with iPhone 14 series as the Cupertino-based tech giant has decided to ditch the physical SIM card slot in the States. So, here is what you should know about eSIMs including the activation and setup process.
What is eSIM?
An eSIM is essentially a digital version of a physical SIM card. It is embedded inside the phone which eliminates the need for swapping SIM cards. All you need to do is to activate it digitally through a process. In the case of iPhones, Apple says a user can activate a minimum of eight eSIMs and use up to two of them at the same time. This is particularly beneficial for frequent international travelers.
How to activate eSIM on iPhone 14
There are different ways an eSIM can be activated on iPhone 14. It depends on your carrier and whether you are coming from a physical SIM or want to transfer your existing eSIM from another device. It will also depend on if you are doing the process on the same phone or between two different devices. Let’s have a look at each of these methods one by one.
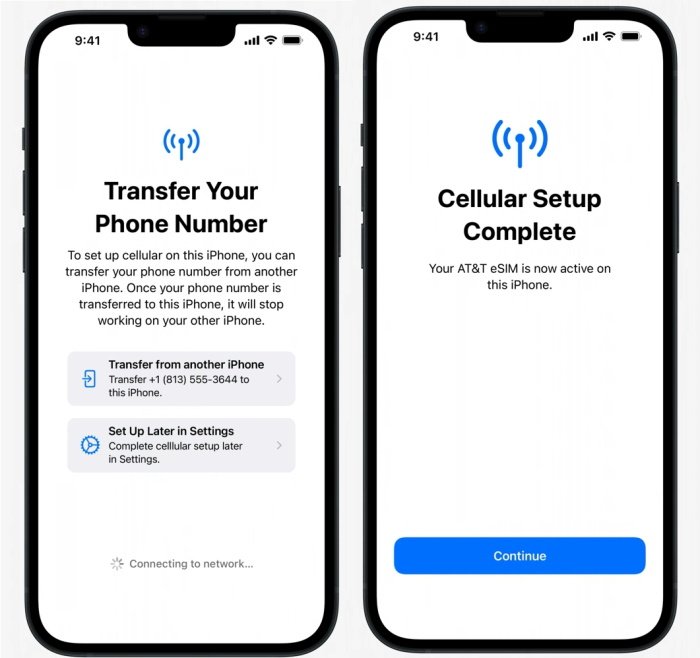
Transfer physical SIM/eSIM from another iPhone to eSIM on new iPhone
- Visit Settings > Cellular > Add Cellular Plan on your new iPhone.
- Choose your cellular plan for the transfer process. If you do not see a bunch of numbers, you need to tap Transfer From Another Device. Both old and new devices should be running iOS 16 or higher for this to work.
- Your older iPhone should show instructions that you need to follow. Tap Transfer to complete the process. If it asks for a verification code, it will pop up on your new iPhone.
- Wait until the cellular plan gets activated on the new iPhone. This will also result in your older SIM getting deactivated at the same time.
- If you happen to see a Finish Setting Up Your Carrier’s Cellular Plan banner on your new iPhone, tap on it to follow on-screen instructions to finish the process.
Convert physical SIM to an eSIM on the same iPhone
- Visit Settings on your iPhone.
- Tap Convert to eSIM followed by Convert Cellular Plan.
- Tap Convert to eSIM here too and wait for activation to complete.
- This will deactivate your physical SIM. Remove it from the iPhone and restart it to start using your eSIM.
It should be noted that this process may not work for all carriers. If your carrier does not support it, get in touch with them to know what eSIM conversion process they support.
Scan QR code to activate eSIM
There are some carriers that provide users with QR codes for eSIM activation. You should see the QR code scanning option while setting up your new iPhone. Tap on the option and follow on-screen instructions. If you are activating eSIM later, follow these steps:
- Open the iPhone camera app and scan the QR code shared by your carrier.
- Tap Cellular Plan Detected notification when it appears.
- Tap Continue at the bottom of the screen.
- Tap Add Cellular Plan to proceed. If it asks for an activation code, enter the code provided by the carrier.
- If your carrier asks you to install an app to complete the process, do that.
You should be able to activate eSIM on iPhone 14 (or any iPhone) with one of these methods. If you are facing any issues or have any doubts regarding eSIM, feel free to ask them in the comments. You can also get in touch with your carrier’s customer support.







Comments